Bot trading configuration
After setting up the exchange API's you're ready to configure the bots. If you haven't done so yet please click here to go through the proper steps for using our platform. Let's get started;
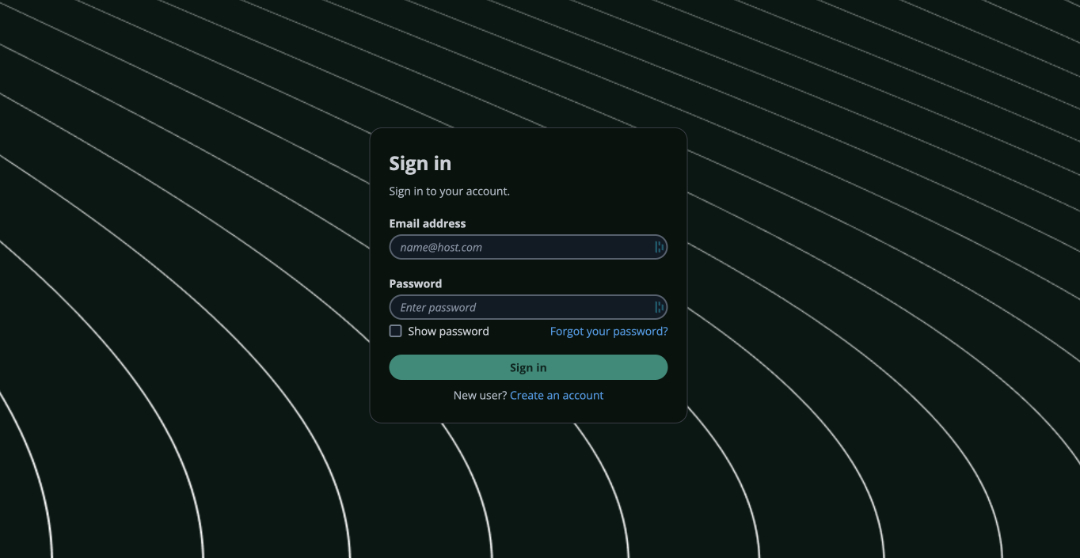
1. Login to my.smartpositions.io


After setting up the exchange API's you're ready to configure the bots. If you haven't done so yet please click here to go through the proper steps for using our platform. Let's get started;
1. Login to my.smartpositions.io
2. Navigate to the Bot trading configuration tab
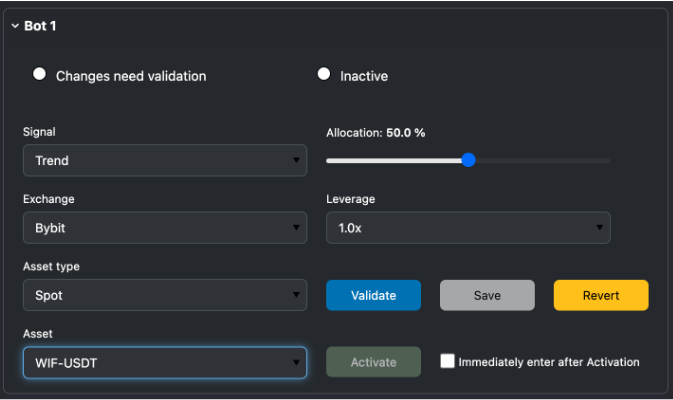
Select your preferred signal type. Currently only "Trend" is available. The "Trend" signal is making sure that you're part of a trend without over-trading during sideways price action. It's an ideal companion to not miss out, trading multiple assets simultaneously.
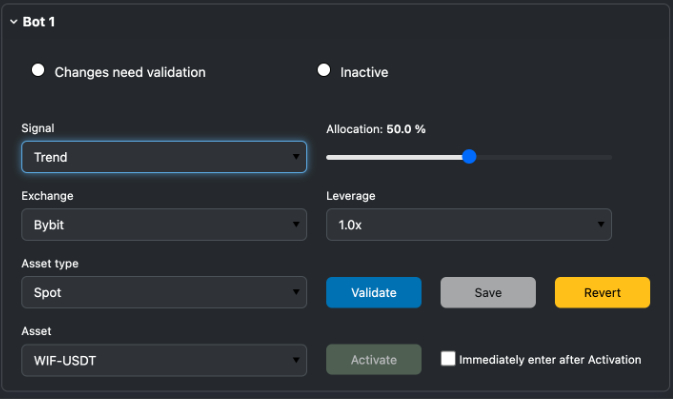
3. Select your preferred exchange
Select the connected exchange for trading. In the case of multiple exchange connections, it's advisable to setup all bots for one exchange completely before moving onto the next.
4. Select the Asset type
When configuring your bots you have the option to trade multiple asset types from a single account. With Unified Trading enabled on Bybit or Multi-asset collateral on Binance it's possible to trade multiple asset types and bring a diverse and powerful ensemble of asset types to your portfolio. We offer support for Spot and Derivatives products (Perpetuals & Inverse perpetuals).
5. Select the Asset & Allocation
Proceed by selecting the Asset you would like to trade. We offer various asset categories and volatility profiles each providing their respective returns. After selecting the asset you can use the allocation slider to determine the % of portfolio you would like to allocate to this bot/asset.
6. Select your bot Allocation
The allocation slider relates to the % amount of the portfolio being used by the bot.
For example a 20% allocation trading a spot asset (for example Bitcoin) will result in 20% of the funds being used by the bot to buy the selected asset.
When trading a Perpetual Futures (USDT/USDC) asset the allocation relates to the % of the portfolio being used as collateral to trade the instrument.
In the case of inverse perpetuals it's wise to use a specific sub account or exchange for this instrument. The bot will use the % allocation of the relevant asset as collateral to go long or short, the profit will be expressed in the collateralised asset for example Bitcoin.
7. Setting the Leverage amount
For trading Perpetual Futures (USDT/USDC) and Inverse Perpetuals, we offer a range of leverage options. To ensure the safety of our users, we’ve limited the available leverage. The options include 1x (no leverage), 1.5x, and 2x leverage.
For example, if you have $1000 in your account and allocate 100% to Bitcoin Perpetual Futures, the bot will open a position worth $1000 in Bitcoin. With 1.5x leverage, the position value increases to $1500, and with 2x leverage, it rises to $2000.
Leverage is a double-edged sword—it can amplify profits, but it also increases the potential for greater drawdowns. To minimize risks, we have carefully tested and selected the maximum "safe" leverage for our platform users.
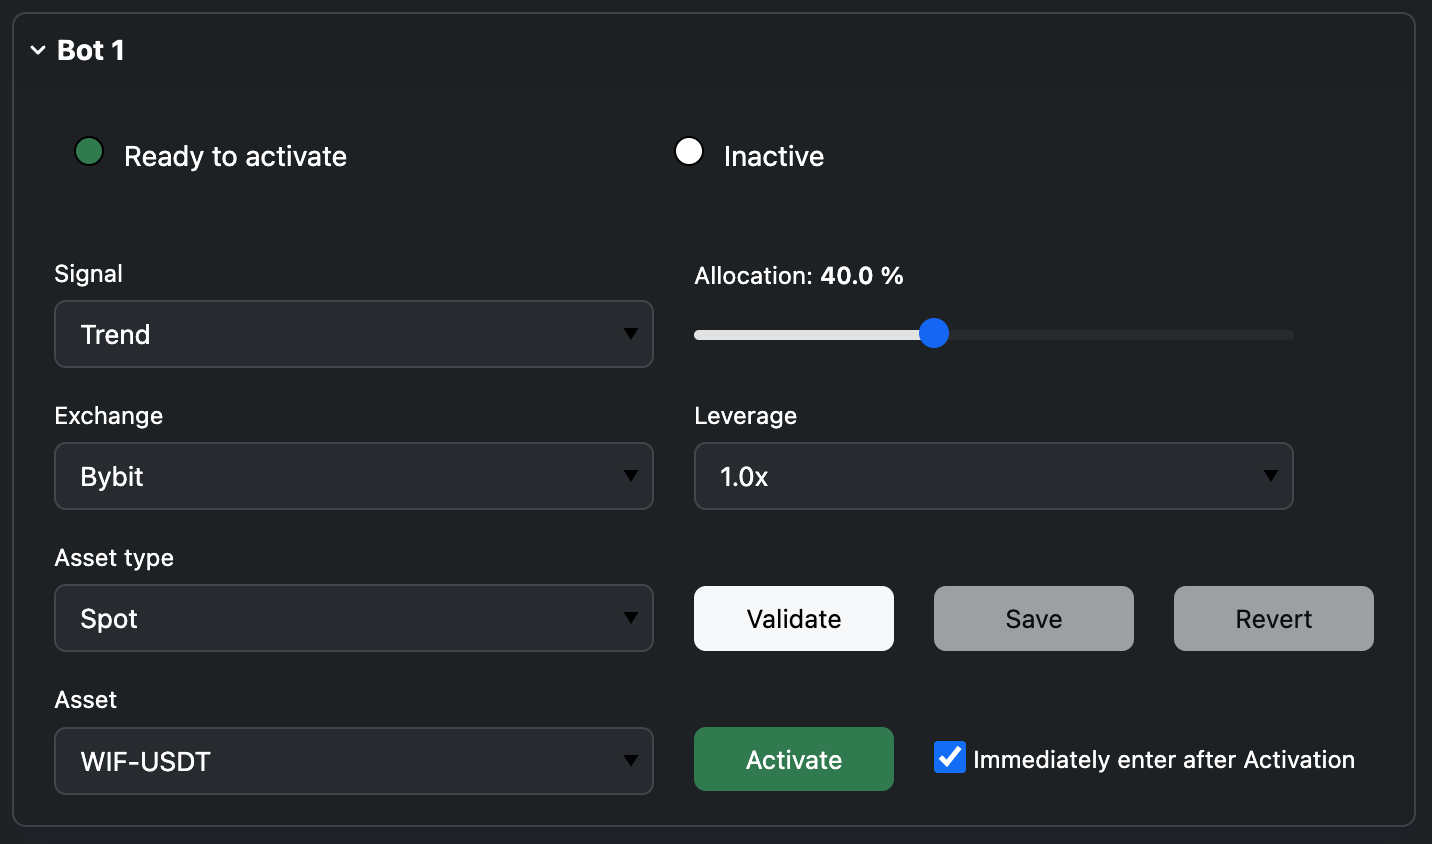
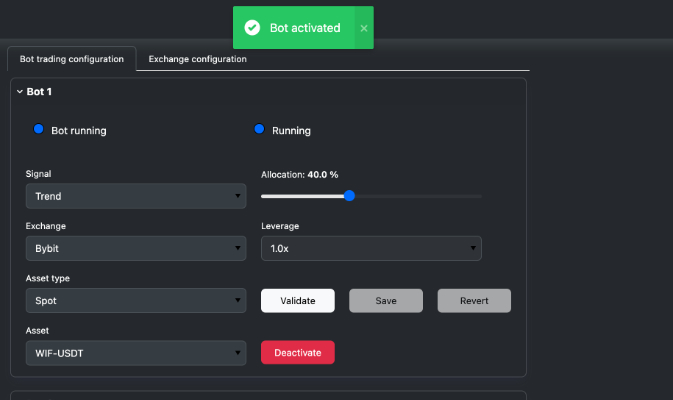
8. Validating, Saving and Activating the bot
Once you’ve set all your preferences, it’s time to finalize the process.
Start by validating your settings—simply click the “Validate” button. After receiving the validation confirmation, save your settings by clicking “Save.” Once everything is saved, click the “Activate” button. Upon confirmation, your bot will be live and will open a trade as soon as a signal is received. Congratulations!
Please note the checkbox next to the “Activate” button. If checked, the bot will open a position immediately upon activation. This feature is generally not recommended, and we advise using it only if you're transitioning from spot holding to futures trading, for example.
